18
Git Squash Simplified
If you have just started as an open source contributor or planning to become one, you might came across the open source projects which makes you to squash all the commits into a single one before or after opening a pull request.
And as a beginner, It might feel challenging to you as the fear of messing up with other's commits can be there but all of this can be eliminated by using correct tools and extensions.
In this post I'll help you to get over this fear will also help you to master and get comfortable with squashing commits.
Let's start with the definition itself.
To "squash" in Git means to combine multiple commits into a single one.
You can squash commits at any point in the time but it's highly recommended to squash the commits while there's a correction or suggestion being done and you don't want to add an extra commit into the git history stating the corrections you've made.
I would recommend using VSCode as your code editor with the GitLens extension installed. In this tutorial I'll be using the same.
So Let's get started!
Git comes with nano as its default code editor, In order to make use of the GitLens extension you've to change the Git's defaut code editor to Visual Studio Code.
To do so enter the command in the terminal
git config --global core.editor "code --wait"
This will change your default code editor in git from nano to vscode.
Now you're all set.
Let's say you have made a correction to your code and committed the changes. After doing so let's get the overview of the commits you want to squash.
To enlist the commits type below command in the terminal (Make sure you're in the same directory/git repository you want the squash the commits in.)
git log --onelineHere's my output

Now Let's squash those commits
In order to squash the commits we don't have any explicit command like git squash or anything like that in git rather we use the rebase method to achieve the squashing of commits.
So, To squash the commits you made type in the command:
git rebase -i HEAD~Nwhere N is the number of commits you want to squash
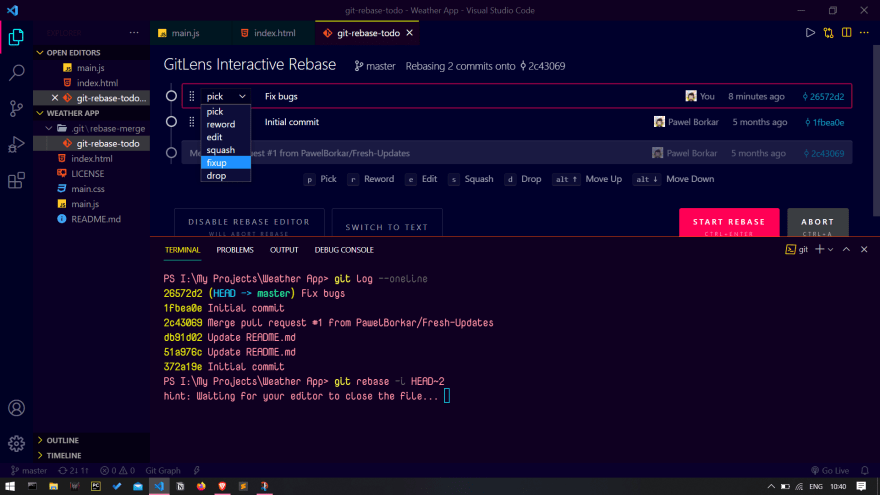
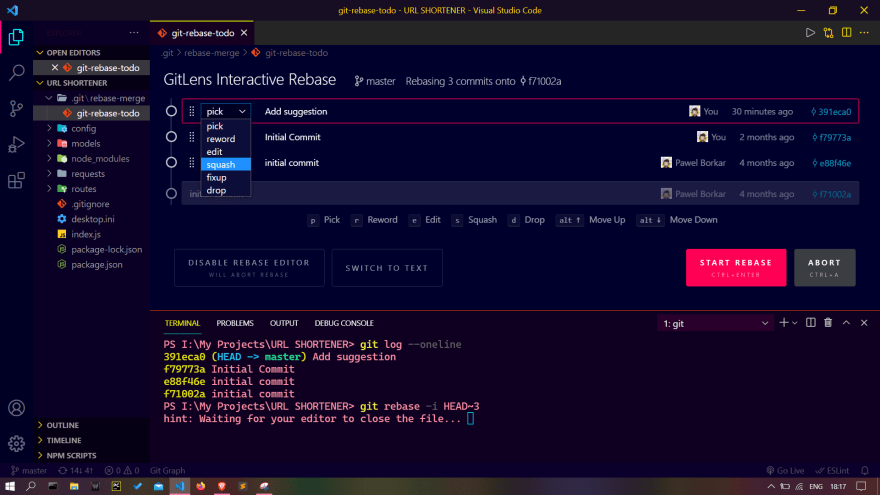
I'll be squashing recent 2 commits so that's how my terminal will look like


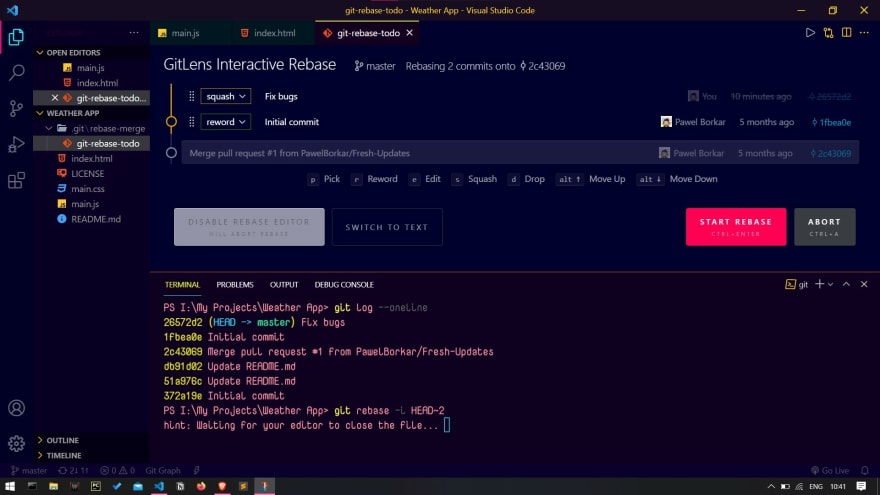
and select the reword from the dropdown in order to edit the commit message while squashing.
After selecting the options your vscode window may look like this


Now let's start the rebasing by hitting on Start Rebase
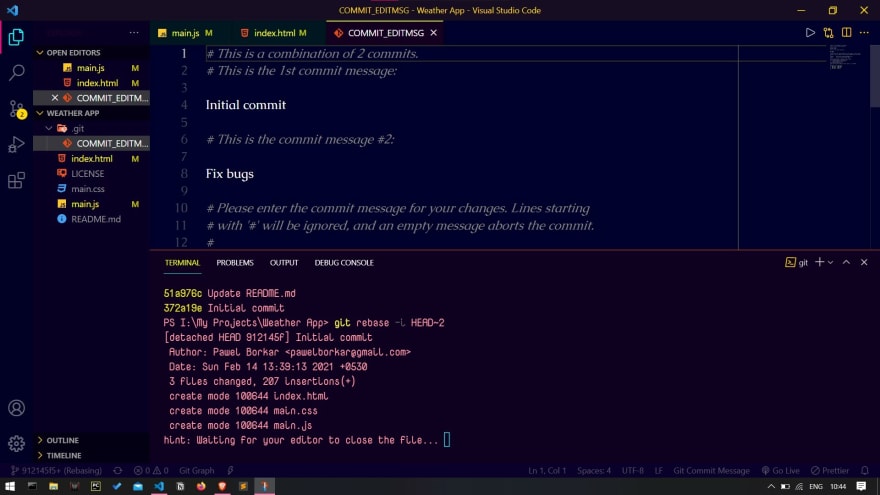
As soon as you hit the Start Rebase button a new commit message tab will open in the editor. This is why we've set vscode as the default code editor for the Git in order to get this tab open up in the vscode itself which will further make it more easier to edit the commit messages without any hussle of remembering the shortcut keys for the nano code editor this will completely eliminate those steps making your workflow more optimized and efficient.
Since we've chose the reword option for the previous commit it will ask us to edit the commit message for that commit message.
I will be keeping it as it is, so press Ctrl+S or Cmd+S (MacOS users)
As soon as you save and close this tab the new rebase commit tab will open which will again confirm the messages you wanted to have in the squashed commit.

Again I will be keeping it as it is, so press Ctrl+S or Cmd+S (MacOS users) and close the tab.
It can be seen by typing in the following command in the terminal again
git log --onelineand here's the output

You can see the Fix Bugs commit has got squashed and as we haven't changed the previous commit it remained same. And when you type git log it will show you both the messages remembered that second commit message tab? It came from there.
Thank you so much for reading this post and I hope this post will help you to squash your commits even more easier and faster. Feel Free to give any suggestions and if you like my work you can connect with me via Twitter or LinkedIn
Have a great day 😊
18


