33
Introduction to Azure Kubernetes Service
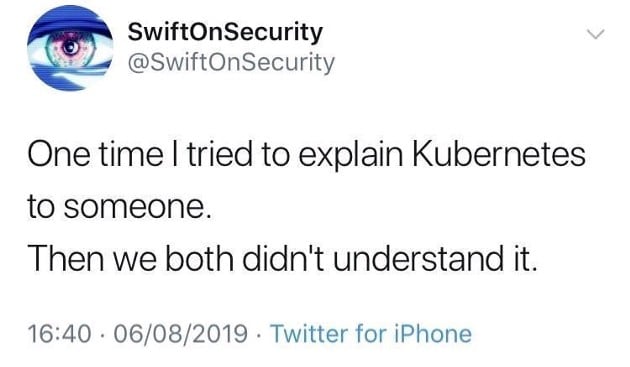
I've wanted to get my head around Kubernetes for a long time now. I've worked with Azure Functions a lot and I've had some minor experience with Docker, but the only experience I've really had with Kubernetes is indulging in the odd meme, like this one:

So why learn it? Simply put, I like a challenge 😊
It's also probably going to come up in my future. I work with Azure Functions now, but there will be a day when I work with a client that uses containers. Those containers will need orchestration and I guarantee one of the C-Levels for that client would have attended a Kubernetes sales pitch and decided it was the best thing ever and we have to absolutely use it, so I might as well take some time to learn it.
Besides, how hard can Kubernetes really be?

In this article, I'll go over what Kubernetes is, what Azure Kubernetes Service is, cover some basic terminology for Kubernetes and how we can provision an AKS cluster using the Azure Portal.

Kubernetes is an open-source system for orchestration platform. It takes a declarative approach to orchestrating containers. You state what you need and Kubernetes takes care of deploying what you asked for.
Fun Fact: Kubernetes originates from the Greek language, meaning helmsman or pilot. You'll sometimes see Kubernetes referred to as K8s, 8 for the number of letters between the K and S.
The purpose of Kubernetes is to provide us with a framework to run distributed systems in a more resilient way, taking care of scaling our application and handling failovers.
According to their docs, Kubernetes provides us with the following benefits. Now since I don't actually have any experience of this yet, I can only really take their word for it:
- Service discovery and load balancing - (We can expose our container using the DNS name of the cluster or using the K8s IP address. K8s will handle the load balancing for us, which sounds neat)
- Storage orchestration - K8s allows us to automatically mount storage systems.
- Automated rollouts and rollbacks - You can state how we want to deploy our containers using K8s and it can change to that state at a controlled rate.
- Automatic bin packing - You can provide K8s with a cluster of nodes that it can use to run tasks, and K8s can fit containers onto your nodes to make the best use of the resources you allocate it.
- Self-healing - Kubernetes can restart containers that fail, replace containers and kill those that don't respond.
- Secret and configuration management - We can store and manage sensitive information and update these secrets without rebuilding container images and exposing secrets in your stack configuration (Seems handy 😊)
As a Data Platform MVP, I'm going to take advantage of my Azure experience and deploy a Kubernetes clusters using Azure Kubernetes Service.
Azure Kubernetes Service, or AKS for short, is a managed service for Kubernetes that makes creating and managing Kubernetes clusters easier. AKS sets up the K8s main node for us, and will create the VMs in your Azure subscription to use as worker nodes. We don't pay for the main node, but we do pay for the worker nodes.
It also has the advantage of being integrated with Azure Load Balancer and Application Gateway. When we create Services in Kubernetes, these will route traffic that our Services need to the right node that hosts it.
Before we create an AKS cluster, it's probably a good idea to go over some basic K8s terminology!
Let's start with Pods. Pods are a group of one or more containers. We can use Pods to host a single or multiple containers within them.
If we have multiple containers within a Pod, they will all share the same network namespace and file system. When we design Pods, we should only put containers in the same Pod that need to be integrated with each other.
Pods are ephemeral resources. This means that they can be terminated at any point and restarted on another node. When this happens, any state that was stored on that Pod will be lost.
Moving on to Deployments, these allow us to create multiple Pods in the same definition and we can perform updates to our Pods using deployment YAML files. (We all love YAML right?)

In Kubernetes, Deployments will create something called ReplicaSets, which will create the Pod. ReplicaSets will maintain a stable set of Pods and when we deploy an update, K8s will create a new ReplicaSet that will contain our updated deployment.
Finally, Services in K8s allow us to expose multiple Pods in our Deployments under a single IP address and a single DNS name. Each Pod has its own private IP, but since they are ephemeral, this will have an impact on their IP address, so we can use a Service to connect our applications together under a single IP address.
There are a few ways we can provision an AKS cluster in Azure. We can use the Azure CLI, PowerShell, Terraform or Bicep.
For this tutorial we will keep it simple and provision a cluster using the portal.
In the Azure Portal, we can start the process by heading into the portal and clicking Create a Resource:

We can then search for Azure Kubernetes Service by looking for Kubernetes Service:

Click on Create to get started.
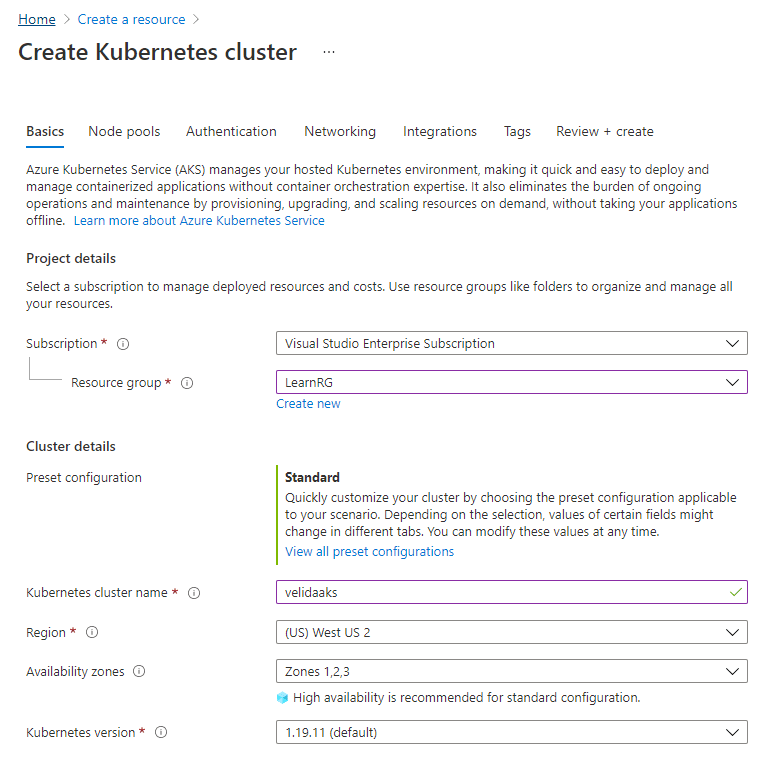
We need to provide some basic details to provision our cluster. First up, we to give it a name and tell Azure which region we want to provision our cluster to. We can also tell Azure which Kubernetes version we want to use and state how many availability zones we want to use, but for now let's keep it simple and just keep the defaults.

Now let's decide how big our primary node pool should be. Remember that the main node won't cost us anything, but our worker nodes will be charged. In order to change the size of our node, we can click Change size.
We can pick a cluster size depending on our needs. The bigger our workload requirements, the bigger our cluster size needs to be. Once we provision our cluster, we cannot change the size of them. Thankfully the portal has a helpful guide to choosing a cluster size.

When you've chosen a cluster size, we can also change how we will scale our Nodes and how many nodes we want to scale to. Once everything is set up, it should look like this:

We can set up custom configuration for authentication, networking etc, but for now just leave the defaults and click Review + Create

Wait for a short while and we should have our Kubernetes cluster ready and raring to go:

In this article, we covered some basic terms and provisioned a Kubernetes cluster via the Azure Portal.
I'm looking forward to seeing where this Kubernetes learning journey takes me! I'm planning to blog as I learn, so feel free to join me and let me know how you get on!
And of course, if you have any Kubernetes memes that you want to share with me, please tweet them at me 😂
The good folks at Azure have created a learning path for Kubernetes which I'll be using heavily for my learning. You can check that out here: https://azure.microsoft.com/en-us/resources/kubernetes-learning-path/
Happy coding 💻
33
