20
Jupyter on Docker
🐬Docker is like an isolated operating system where you can build and run all your development needs in a docker environment and we are going to install and run jupyter notebook from docker. Jupyter starts up a local Python server to serve these apps to your web browser.
Get the Docker image of jupyter notebook from here
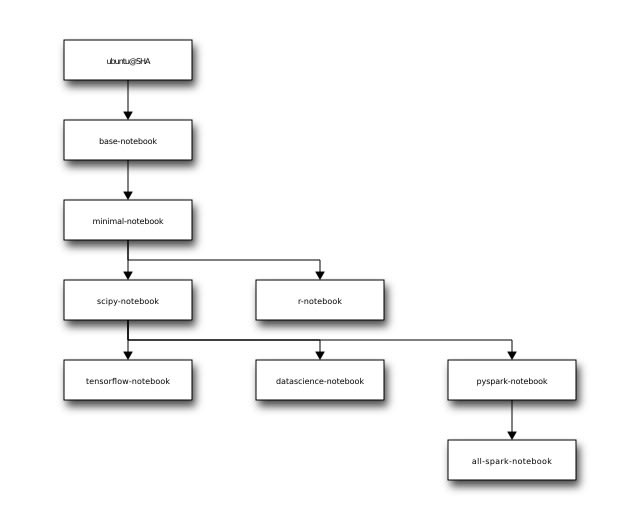
They have a list of different docker images for various needs
- jupyter/base-notebook
- jupyter/minimal-notebook
- jupyter/r-notebook
- jupyter/scipy-notebook
- jupyter/tensorflow-notebook
- jupyter/datascience-notebook
- jupyter/pyspark-notebook
- jupyter/all-spark-notebook

If you are just here to test things out you can try
minimal-notebookit has the basic jupyter notebook features in small image size.
You can tryjupyter/all-spark-notebookwhich has access to all the features but in cost to its larger image size. It depends upon your need but the steps are going to be the same for all.
For this post, I am using jupyter/scipy-notebook
First, we will pull the docker jupyter image to your local machine.
docker pull jupyter/scipy-notebook:latestNext, we will run the image in a docker container.
docker run -it --name scipy-notebook -p 8080:8888 jupyter/scipy-notebook:latestThis will start a container that contains our jupyter scipy notebook image or whatever image you used.

navigate to your browser localhost port 8080 http://localhost:8080/ to access jupyter notebook in a browser.
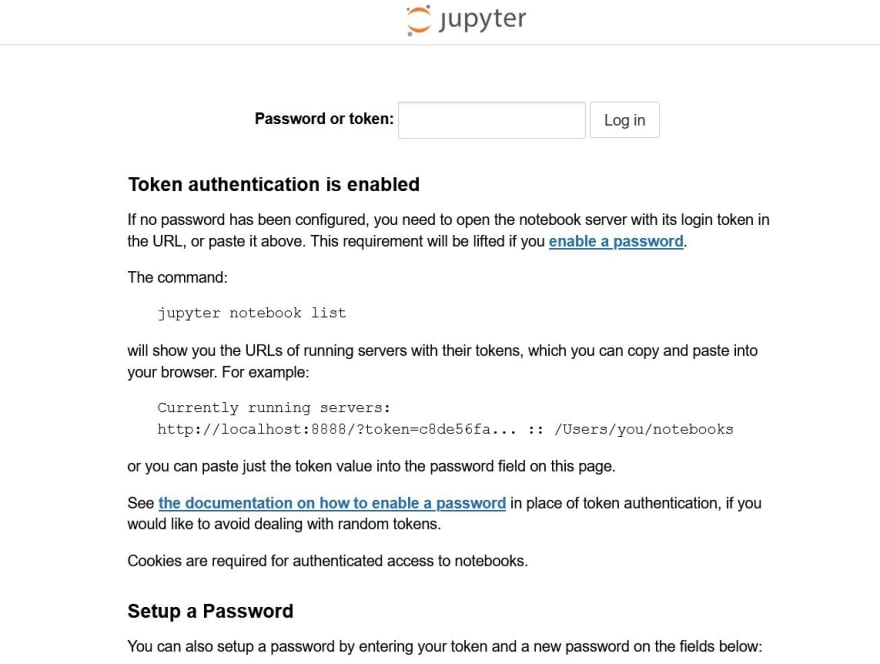
If you see any password or token required page in jupyter follow the step below else you can close this tab and play with jupyter notebook in docker.

Open your current running docker container which contains the image of the jupyter notebook and type:
jupyter notebook list

20
